Let’s Get Crafty: Making a Dog Origami!
Hey there, fellow dog lovers!
Are you looking for a fun and creative way to spend some quality time with your furry friend without actually having to leave the comfort of your home?
Look no further!
Today, we’re diving into the wonderful world of origami and learning how to fold an adorable dog origami together.
Origami, the ancient Japanese art of paper folding, is not only a relaxing and mindful activity but also a fantastic way to express your love for dogs.
Whether you’re a seasoned origami pro or a complete beginner, I promise that you’ll have a blast creating your very own paper pup.
What You’ll Need:
- Square sheets of paper – You can use origami paper, colored construction paper, or even plain printer paper.
- Patience and a positive attitude – Remember, practice makes perfect!
Step 1: Choose Your Paper
Start by picking out the paper you want to use.
If this is your first time making origami, it might be easier to begin with larger, colored paper.
However, any square sheet will work just fine.

Step 2: Fold It in Half
Take your square sheet of paper and fold it in half to get the middle line.
Take the top corners and fold them creating a triangle.
Make sure the edges align perfectly and then unfold it.

Step 3: Fold the Corners
Fold the top layer of the triangle down so that the top edge aligns with the bottom edge.
This will create a smaller triangle.

Step 4: Fold It Again
Now, fold the left and right corners of the triangle inward so that they meet at the centerline.
This will form a diamond shape.

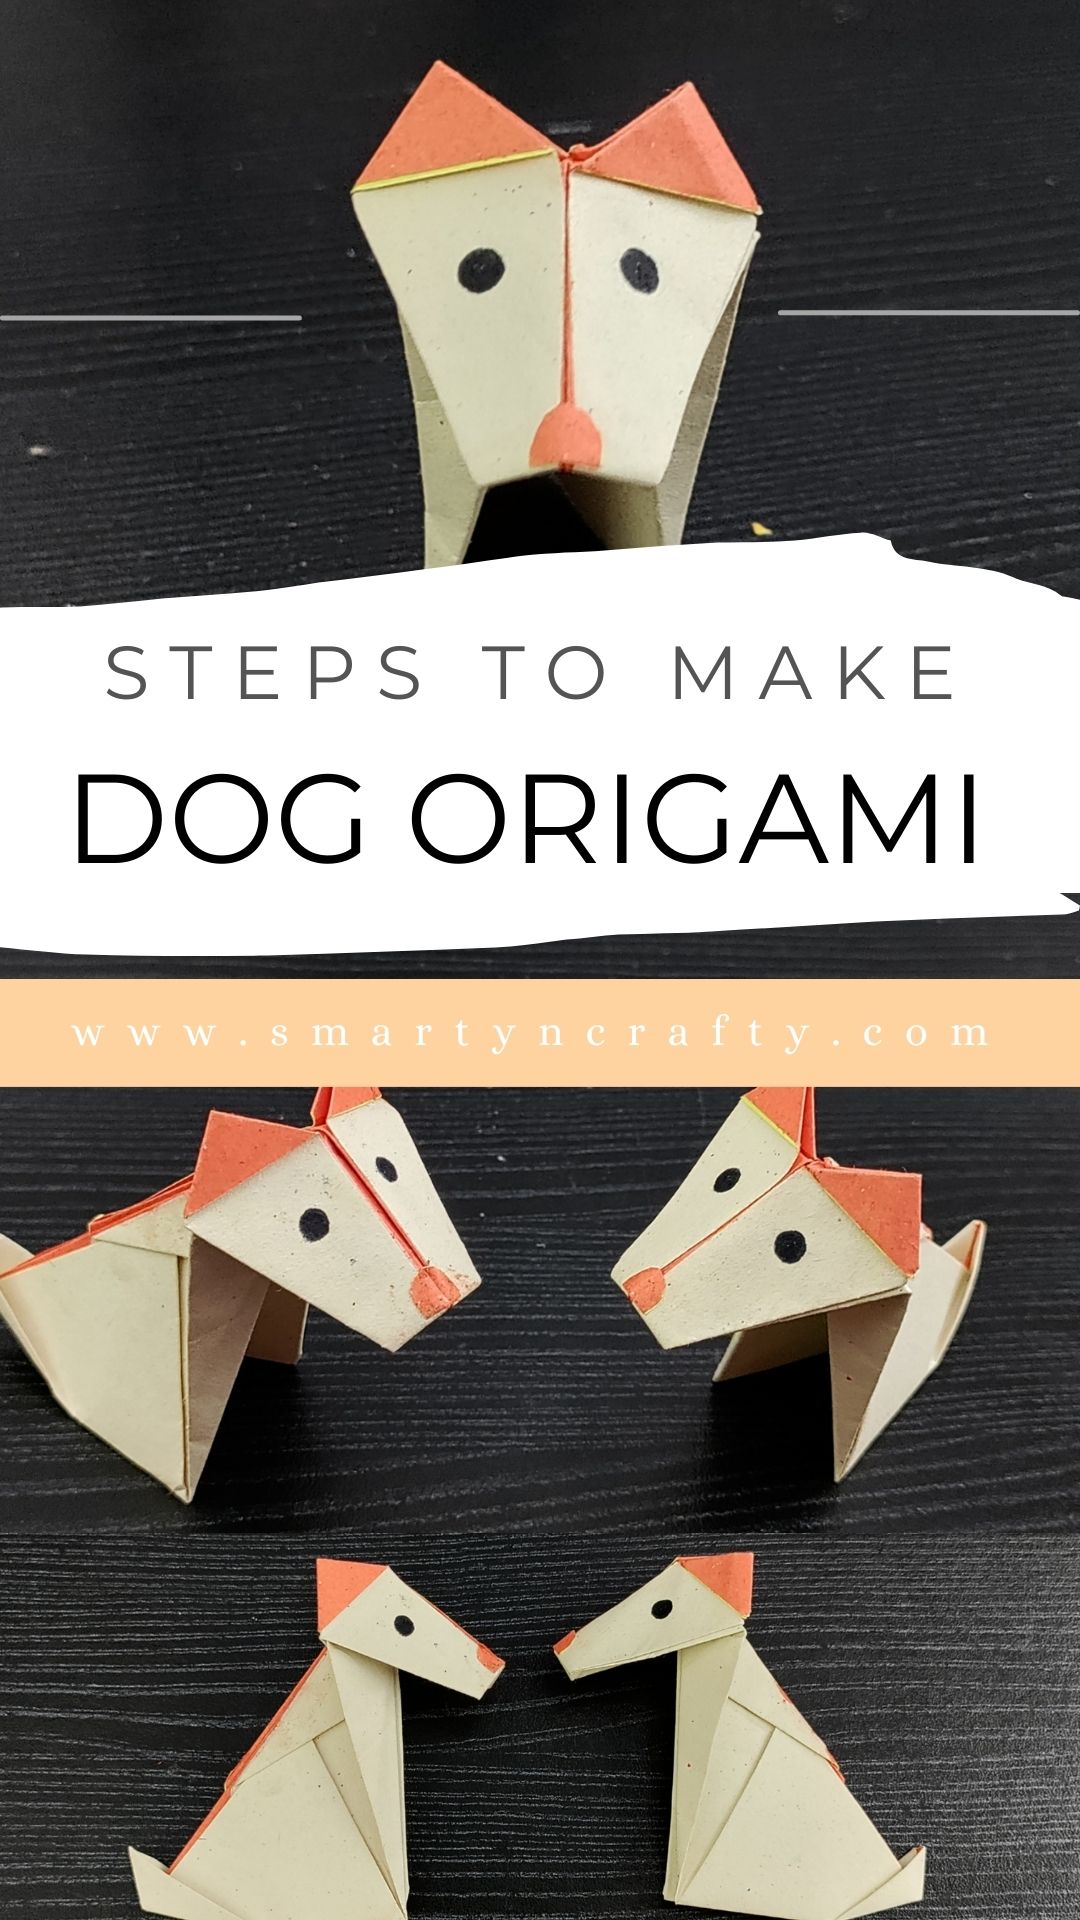
Step 5: Create the Dog’s Head
Take the top flap of the diamond and fold it down, leaving a small portion at the bottom unfolded.
This will be your dog’s head.

Step 6: Fold the Ears
Fold the two top corners of the head down to create the dog’s ears.
This step gives your origami dog its signature look!

Step 7: Draw Some Facial Features
Now, it’s time to add some personality to your paper pup.
Use markers or colored pencils to draw eyes, a nose, a mouth, and any other features you like.
Get creative!

Step 8: Tail Wagging Time
To complete your dog origami, fold up a small triangle at the bottom to form the tail.
This adds a cute finishing touch.
And there you have it – your very own dog origami creation!


I know I know that making origami with steps and images is not very clear.
So here goes the dog origami video for you.
It might take a bit of practice to perfect the folds and make your dog look just the way you want, but remember that the most important thing is to have fun and enjoy the process.
You can make a whole pack of origami dogs in different colors, sizes, and breeds.
Why not create a little paper doggy family to decorate your desk or give it as a gift to a fellow dog enthusiast?
Origami is a fantastic way to unwind, express your creativity, and pay tribute to your four-legged friends.
Plus, it’s a wonderful activity to share with kids, friends, or family members, fostering a sense of togetherness and accomplishment.
Some other Origami Crafts you might be interested in:
- 7 Steps to Bat Origami
- How to create an origami box with a lid?
- 9 Easy steps to make a Butterfly with Paper
- 8 Steps to make a crane origami
So, grab your paper and get folding!
Your new origami dog is ready to be your loyal, paper companion. Don’t forget to share your creations with us – we’d love to see your adorable origami dogs!
Happy folding!